IAR STM32F 시리즈 개발환경 구축
일단 IAR Embedded Workbench IDE 가 설치되어있어야 합니다!!!
처음으로 자신의 개발보드에 혹은 MCU에 맞는 라이브러리를 다운로드해줘야 합니다.
https://www.st.com/en/microcontrollers-microprocessors/stm32-32-bit-arm-cortex-mcus.html
STM32 32-bit Arm Cortex MCUs - STMicroelectronics
Microcontrollers from the STM32 MCU family are based on Arm Cortex-M processors and designed to offer new degrees of freedom to MCU users.
www.st.com
위의 사이트에 들어가시면
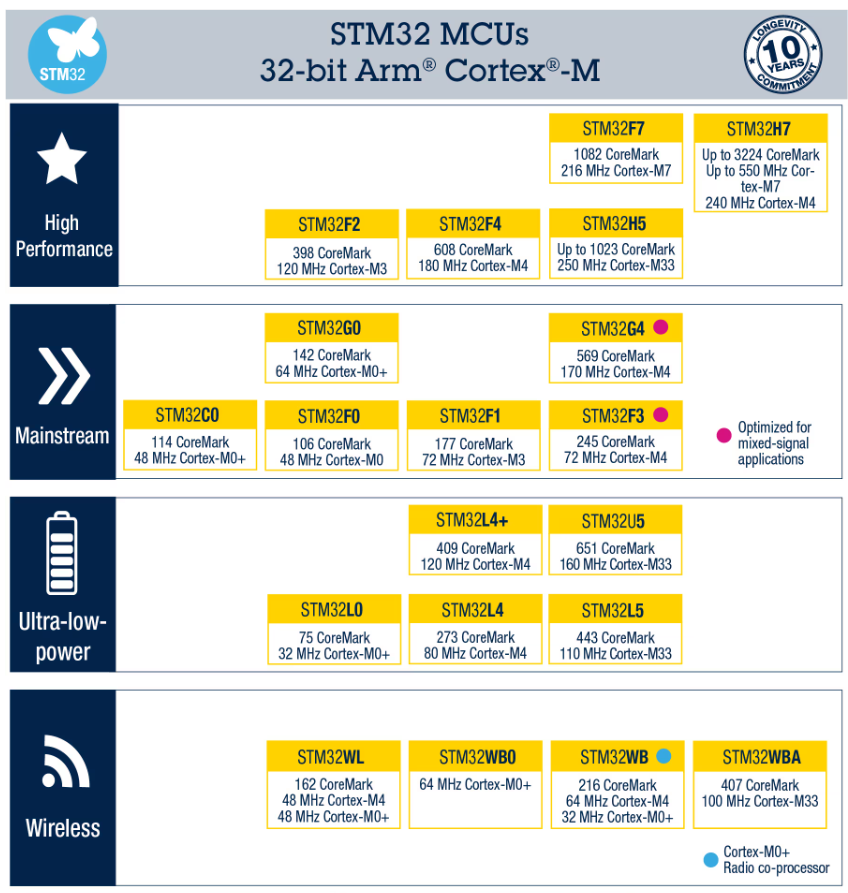
이렇게 MCU 분류가 있습니다. 저 같은 경우에는 STM32F429i-DISC1 개발보드이기 때문에 "High Performance" 에 있는 "STM32F4"를 클릭하여 들어갑니다.
들어가면
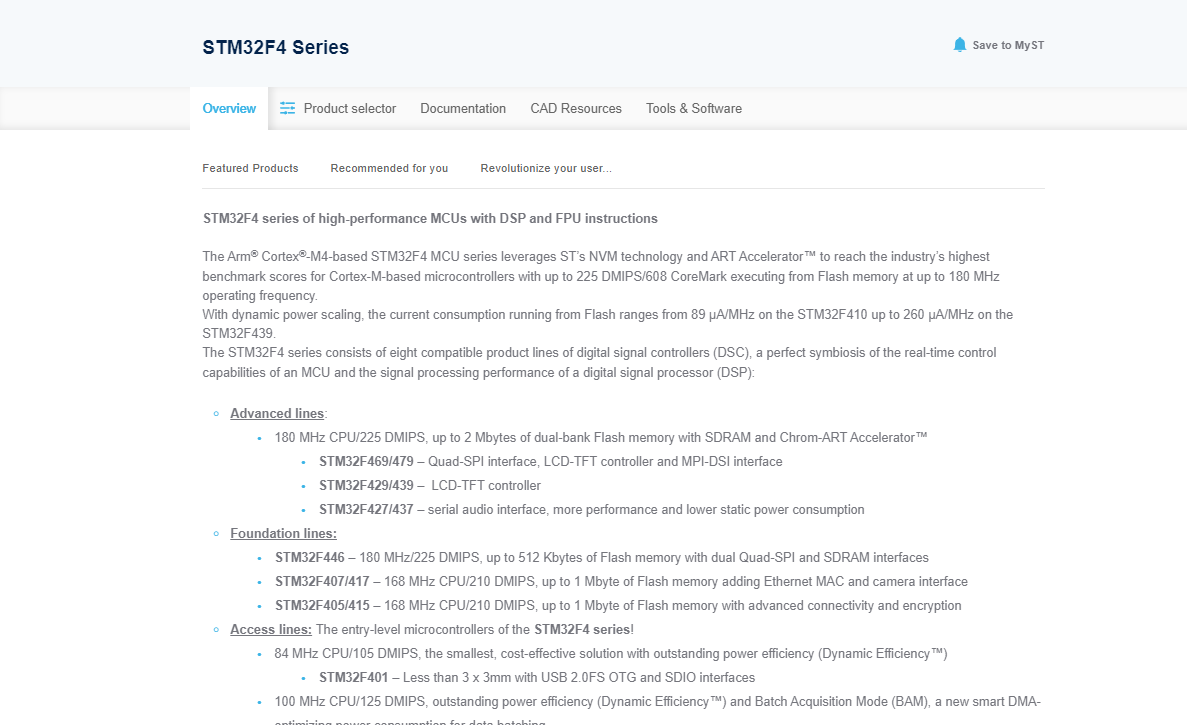
들어가면 위와 같은 화면이 나옵니다. STM32F4 시리즈 정리? 비슷하게 해 놨습니다.
여기서 "Product selector" 를 들어갑니다.

들어가시면 왼쪽에 MCU를 검색할 수 있습니다. 제가 사용할 STM32F429i-DISC1 개발보드 같은 경우에는 STM32F429ZIT6U MCU를 사용하기 때문에 위와 같이 검색해서 클릭하여 "open product page" 로 이동합니다.

"Tool & Software" 로 이동하여 "DSP and standard peripherals library" 를 검색하여

위와 같이 클릭하여 들어가 줍니다.
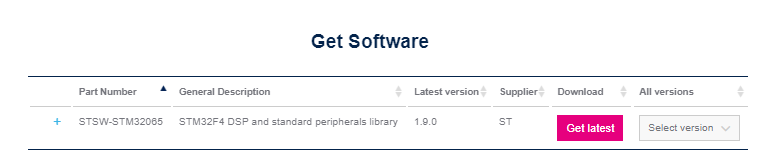
페이지 하단에 있는 파일을 다운로드하시면 됩니다.
위에까지 라이브러리 다운을 받으셨습니다.
다운로드 받은 라이브러리 파일의 압축을 풀어줍니다.
지금부터는 IAR 에서 프로젝트 생성 및 라이브러리 적용입니다.


원하시는 위치에 저장해주세요
저는 바탕화면에 "test"파일을 만들어서 "240126T"로 저장했습니다.
후에 디스켓

아이콘 Save All 을 눌러 " 240126T " Workspace를 코어이름과 동일하게 저장하였습니다.

Add Group으로

위와 같이 Group을 만들어 줍니다.
이제 전에 다운로드한 라이브러리를 폴더에 알맞게 맞춰줍니다.
위에 만든 test 폴더에 하위로 "lib"폴더를 만들어서 그 안에 똑같이 만들어 줍니다.

위에서 STM 'DSP and standard peripherals library' 의 압축을 풀고 폴더 안에 아래와 같이 넣어줍니다.
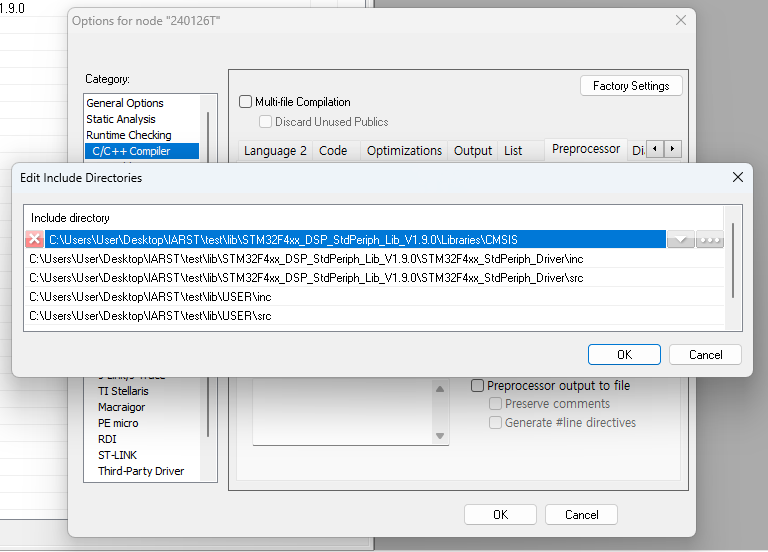
빨간색 1번에
\STM32F4xx_DSP_StdPeriph_Lib_V1.9.0\Libraries\CMSIS\Device\ST\STM32F4xx\Source\Templates\system_stm32f4xx.c
\STM32F4xx_DSP_StdPeriph_Lib_V1.9.0\Libraries\CMSIS\Device\ST\STM32F4xx\Source\Templates\iar\startup_stm32f429_439xx.s
\STM32F4xx_DSP_StdPeriph_Lib_V1.9.0\Libraries\CMSIS\Device\ST\STM32F4xx\Include\stm32f4xx.h
\STM32F4xx_DSP_StdPeriph_Lib_V1.9.0\Libraries\CMSIS\Device\ST\STM32F4xx\Include\system_stm32f4xx.h
\STM32F4xx_DSP_StdPeriph_Lib_V1.9.0\Libraries\CMSIS\Include
빨간색 2번에
\STM32F4xx_DSP_StdPeriph_Lib_V1.9.0\Libraries\STM32F4xx_StdPeriph_Driver\inc 모든파일
빨간색 3번에
\STM32F4xx_DSP_StdPeriph_Lib_V1.9.0\Libraries\STM32F4xx_StdPeriph_Driver\src 모든파일
빨간색 4번에
\STM32F4xx_DSP_StdPeriph_Lib_V1.9.0\Project\STM32F4xx_StdPeriph_Templates\main.h
\STM32F4xx_DSP_StdPeriph_Lib_V1.9.0\Project\STM32F4xx_StdPeriph_Templates\stm32f4xx_conf.h
\STM32F4xx_DSP_StdPeriph_Lib_V1.9.0\Project\STM32F4xx_StdPeriph_Templates\stm32f4xx_it.h
빨간색 5번에
\STM32F4xx_DSP_StdPeriph_Lib_V1.9.0\Project\STM32F4xx_StdPeriph_Templates\main.c
\STM32F4xx_DSP_StdPeriph_Lib_V1.9.0\Project\STM32F4xx_StdPeriph_Templates\stm32f4xx_it.c
그다음


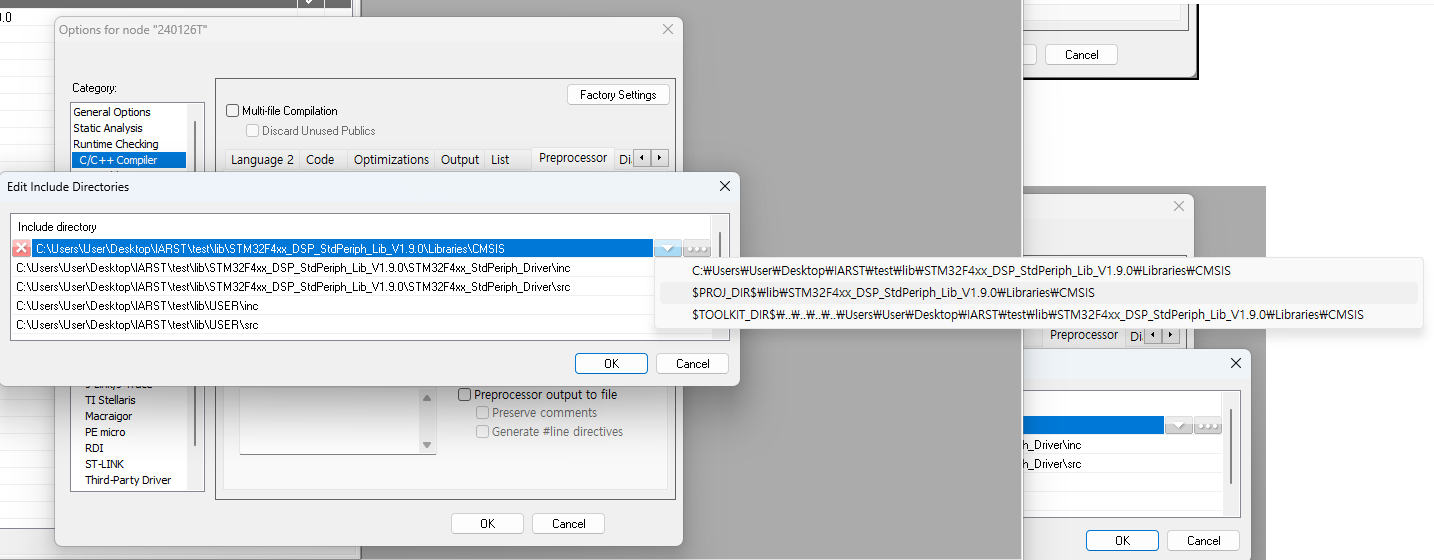
위에 처럼 프로젝트 파일 기준으로 설정해 주시면
나중에 복사해서 다른 곳으로 이동할 때 편리합니다.

HSE_VALUE는 각자 보드에 맞는 크리스탈 주파수를 입력하여 줍니다.

FSMC가 STM32F40x/411x에만 적용된다고 명시되어 있으므 stm32f4xx_fsmc.c 파일 삭제해 주시면 됩니다.


이제 error는 제거했지만 warning 으로 위에 처럼 time어 관련 error가 나옵니다.
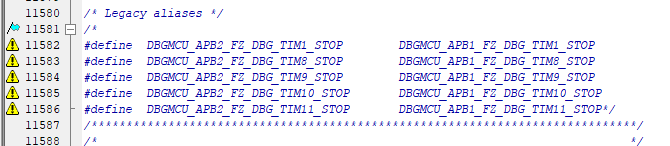
일단 저는 주석 처리로 warning을 없앴습니다.
빌드 해보면
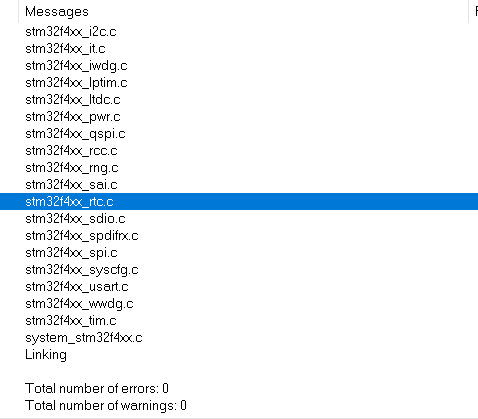
정상적으로 완료가 됐습니다!!